Creating a Movies App using Retrofit and Picasso - Part 2
07 Oct 2015
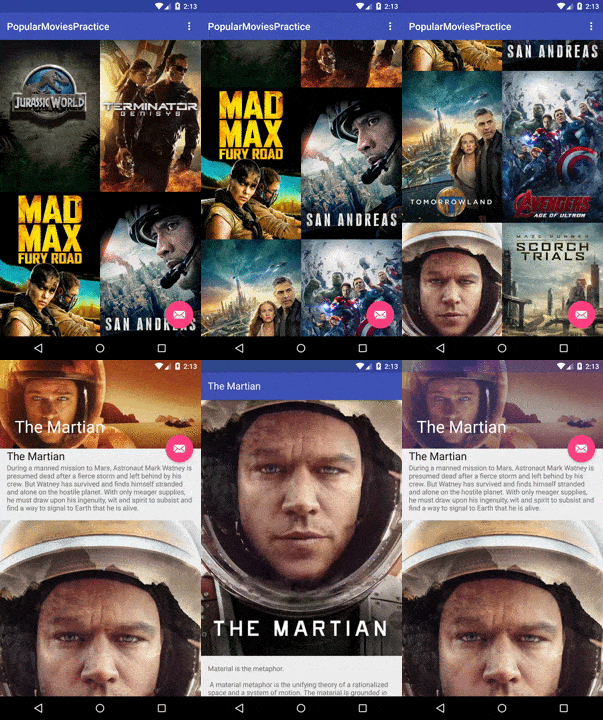
This post is part of my talk “Getting Started with Android Development” at DEvcon. We will be building a movie app that consumes a REST api using retrofit and displays images using Picasso. I see this project as a “Hello World” on steroids, so you don’t need any Android experience to complete it. However, I do recommend having some programming background using Java or another Object Oriented Programming language. In part one, we set up the project and a grid using a mock movie poster. This is part two where we will use Retrofit to consume a REST API and show real movies.
Introducing the Movies Database Api
We will be using The Movie Database Api to get some real data into our app.
Checkout their documentation and get familiar with their API, specially the movies/popular endpoint
Creating the Rest Interface
Retrofit allows us to turn a REST API into a Java interface. This removes a lot of the boiler-plate code one would have to write to accomplish the same results without using any libraries.
Let’s create our REST interface.
Create a new file called MoviesApiService.java under app/src/main/java/com.mateo.popularmovies/
public interface MoviesApiService {
    @GET("/movie/popular")
    void getPopularMovies(Callback<Movie.MovieResult> cb);
}
Let me explain what we just did before going any further. We’ve created a new Java interface that will represent our API (TMDB API). Each method of this interface corresponds to an endpoint of our REST API. We need to annotate our methods to let retrofit know two things: what kind of request the method executes, and what endpoint it must connect to. Retrofit allows you to make @POST, @UPDATE, @PATCH, @DELETE, and @GET requests. Notice that we’re only including the part of the TMDB Url that changes from endpoint to endpoint. The rest, we will tell retrofit at the time of initialization. I will show you how to do that shortly.
When the results from the API come back, they’re not just a list of movies. If they were, we could pass a Callback<List
public static class MovieResult {
    private List<Movie> results;

    public List<Movie> getResults() {
        return results;
    }
}
Now that our interface is complete, let’s initialize retrofit. Go ahead and open the MainActivity.java file and add the following code right before the end of your onCreate method (or create a new method with this code and call it from onCreate)
RestAdapter restAdapter = new RestAdapter.Builder()
        .setEndpoint("http://api.themoviedb.org/3")
        .setRequestInterceptor(new RequestInterceptor() {
            @Override
            public void intercept(RequestFacade request) {
                request.addEncodedQueryParam("api_key", "YOUR_API_KEY");
            }
        })
        .setLogLevel(RestAdapter.LogLevel.FULL)
        .build();
MoviesApiService service = restAdapter.create(MoviesApiService.class);
service.getPopularMovies(new Callback<Movie.MovieResult>() {
    @Override
    public void success(Movie.MovieResult movieResult, Response response) {
        mAdapter.setMovieList(movieResult.getResults());
    }

    @Override
    public void failure(RetrofitError error) {
        error.printStackTrace();
    }
});
The first thing we do is create a rest adapter. The rest adapter pretty much holds our configuration that will be needed to use the interface we created earlier.
The rest adapter takes the endpoint, which is the first part of the url for our API. That’s the part that doesn’t change regardless of what resouce we’re getting from the API.
Since we have to add our API key to every request, instead of hard-coding it, we create a request interceptor that gets called for every request made using our interface.
The log level tells retrofit how much info about our requests and responses to output.
Once our rest adapter is complete, we use it to create a new object from our interface. The getPopularMovies method is available using a callback. A callback is a method that gets executed by another object. Because getting data from the network might take some time (and many other reasons outside the scope of this tutorial), using a callback makes sense.
On success, the success method of the callback will be called. So inside that method, we will have access to the movie list from the server. We use that movie list and pass it to the adapter.
We’re not done yet. We need to make a few changes to our Movie pojo in order to display the right images and information.
public class Movie {
	public static final TMDB_IMAGE_PATH = "http://image.tmdb.org/t/p/w500";

    private String title;

    @SerializedName("poster_path")
    private String poster;

    @SerializedName("overview")
    private String description;

    @SerializedName("backdrop_path")
    private String backdrop;

    public Movie() {}

    public String getTitle() {
        return title;
    }

    public void setTitle(String title) {
        this.title = title;
    }

    public String getPoster() {
        return TMDB_IMAGE_PATH + poster;
    }

    public void setPoster(String poster) {
        this.poster = poster;
    }

    public String getDescription() {
        return description;
    }

    public void setDescription(String description) {
        this.description = description;
    }

    public String getBackdrop() {
        return TMDB_IMAGE_PATH  + backdrop;
    }

    public void setBackdrop(String backdrop) {
        this.backdrop = backdrop;
    }

    public static class MovieResult {
        private List<Movie> results;

        public List<Movie> getResults() {
            return results;
        }
    }
}
Let’s address the @SerializedName annotation. By default, Retrofit uses a library called Gson that takes a pojo and turns is into valid json, and viceversa. For this reason, each field in your pojo must mach the name of the json property it belongs to. If you want to name something differently, you can annotate the field with @SerializedName to tell gson what property from the json to match this field with.
We also added a static final variable that holds the path prefix for TMDB images. When we get results from TMDB, we don’t get the full path for the images, we only get the id for the image. However, Picasso needs to know the full URL in order to display it. For this reson, we prepend the path ( I found it by reading their documentation) before returning the image id.
By now, you should be able to compile and run the app and see the top 25 movies from TMDB.